
Jam retrospective: Mike's Halloween 2021 Screen Recorder

Since it's time to wrap up the year, I thought it would be a good idea to dig up my favourite Virti jam project from last year. Virti quarterly jam weeks allow us to experiment with new technologies and ideas for a week and give us the space to come up with something that could end up being either super useful or a complete failure. Either way, it's a learning experience and helps keep our creativity well-oiled.
For last year's Q4 jam Virti's CTO, Nils, suggested a screen recording feature that might serve as a quick way to create video content on the platform. I was both hesitant and excited about the idea because it meant dealing with native web APIs I'd never used before, primarily the MediaStream Recording API.
After a bit of research and experimentation, it seemed we needed to make use of the following native APIs:
MediaStreamfor being able to record audio and videoCanvasfor combining multiple video streams into one and for rendering the audio visuallyMediaRecorderfor being able to record the streamsMediaDevicesfor access to user streams and input devicesAudioContextfor combining audio streams and for generating visual audio
Don't Cross the Streams
So how to get started? Apparently, by using streams. Many streams.
For the first iteration, there was a "Start Sharing" button that would prompt the user to screen share. That was done with:
const screenCaptureStream = await navigator.mediaDevices.getDisplayMedia({
  video: true,
  audio: {
    echoCancellation: true,
    noiseSuppression: true,
    sampleRate: 44100,
  },
});
This prompts the user to screen share, which creates a single stream with the video of the screen share and the audio of the microphone and system audio (if checked). This stream would then be sent to a native <video> component so we could see our screen.
Job done!
But hang on... what if users want to be able to add their webcam visuals to the recording? Webcam footage is common across all screen-sharing apps, and we can't do it directly in the native browser screen share. So we need to make use of userMedia by creating another video stream. And a <video> only accepts one stream! This means we can only make the video show either the screen share *or* the webcam footage - not both.
The solution we used for this was to have two video components that capture two separate video streams and then render those onto an HTML <canvas>. Since a canvas is just a... canvas... we can paint whatever we want on it. In this case, we would just need to first paint the screen footage, and then paint the webcam footage on top!
But how do you paint on a canvas in React? I suppose it depends on how often we want to update it. And how often do we want to update the canvas with a video stream? Every frame, of course! The React lifecycle does not make it obvious how to do something like this, but using a hook called useAnimationFrame (that I may have found online), we could add the necessary code inside the callback. To avoid copy-pasting the entire hook here just know that the main concept is that it works by repeatedly calling requestAnimationFrame.
Having set up two video components with two react refs (screenCaptureRef and userMediaCaptureRef), in the callback, it's just a matter of painting those streams.
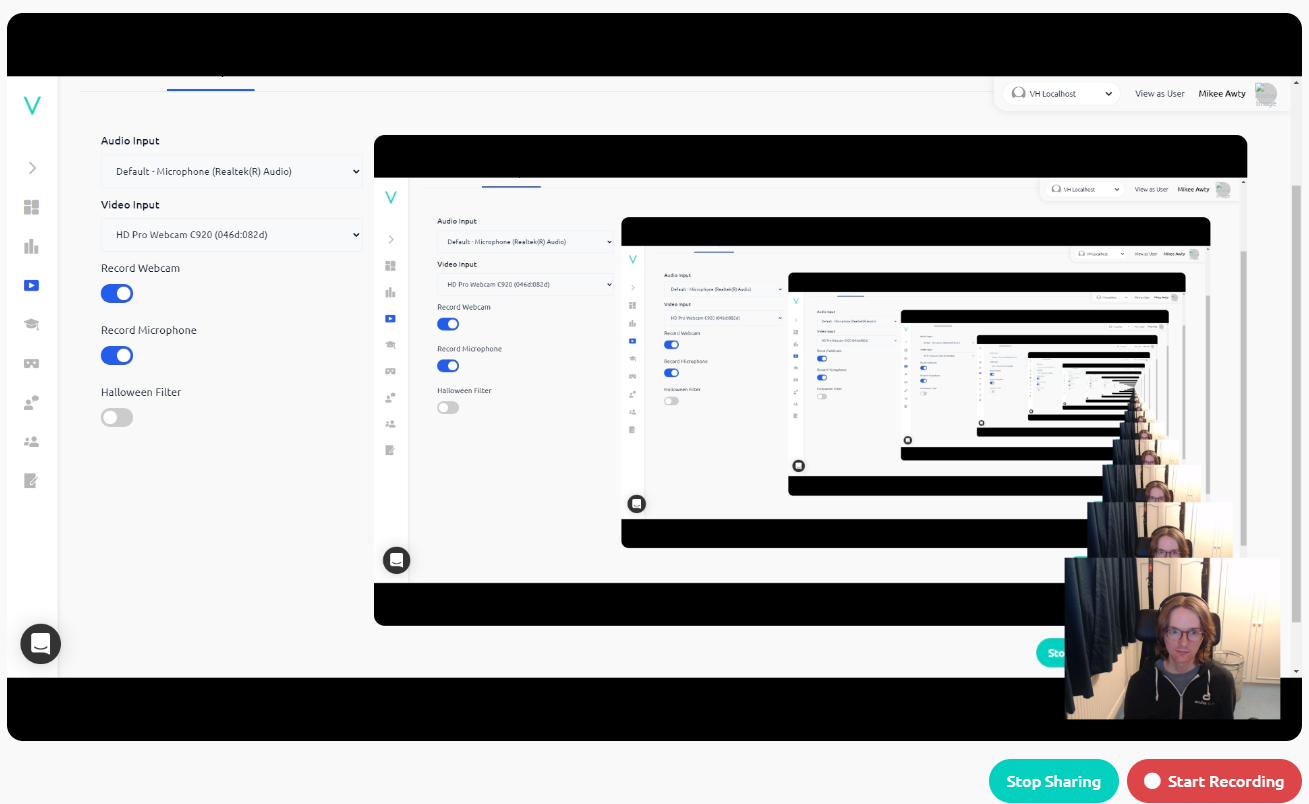
Here it is in action:
useAnimationFrame((delta) => {
  if (!canvasRef.current) return;
  const context = canvasRef.current.getContext('2d');
  ...
  if (capturing?.screen) {
    if (
      screenCaptureRef.current.readyState ===
      screenCaptureRef.current.HAVE_ENOUGH_DATA
    ) {
      ...
      context.drawImage(
        screenCaptureRef.current,
        comparedTo16by9 === 'narrower'
          ? Math.abs(
              canvasRef.current.width - screenCaptureRef.current.videoWidth
            ) / 2
          : 0,
        comparedTo16by9 === 'wider'
          ? Math.abs(
              canvasRef.current.height - screenCaptureRef.current.videoHeight
            ) / 2
          : 0,
        screenCaptureRef.current.videoWidth,
        screenCaptureRef.current.videoHeight
      );
    }
    ...
  }
  if (capturing?.userMedia && showWebcam && videoInputDeviceId !== '') {
    const webcamWidth = userMediaCaptureRef.current.videoWidth / 2;
    const webcamHeight = userMediaCaptureRef.current.videoHeight / 2;
    const webcamOffset = 32;
    context.drawImage(
      userMediaCaptureRef.current,
      canvasRef.current.width - webcamWidth - webcamOffset,
      canvasRef.current.height - webcamHeight - webcamOffset,
      webcamWidth,
      webcamHeight
    );
  }
});
The main logic can be seen above where you can see that we're using drawImage to render the screen capture stream - if it exists and is ready - onto the canvas (and at a resolution defined based on the aspect ratio of the screen sharing to accommodate black bars in what should be a 16:9 stream).
We're then checking if the userMedia stream is active, if the webcam toggle is on, and if there is a video input device selected (more on that in a bit). If so, we draw the user media video stream onto the canvas.
So we're now successfully, on every frame, painting one video stream (the screen share stream) and then another (the webcam stream) on top of that. Because the webcam stream is painted afterwards, it is rendered on top of the screen share! Handy.
Yay! Now We Can... Look At Our Own Screen.
Okay, so what do we do with the canvas now? How do we record what's being shown on the canvas? This is where MediaRecorder comes in, which is part of the MediaStream Recording API. In addition to the "Start Sharing" button, I added a "Start Recording" button that shows up once sharing is active. When this is clicked, the recorder is go:
const mediaRecorder = new MediaRecorder(canvasStream, {
  audioBitsPerSecond: 128000,
  videoBitsPerSecond: 2500000,
  mimeType: 'video/webm',
});

// keep track of start and end recording times in React state so we can know how long the video is
setStartRecordTime(new Date().getTime());
mediaRecorder.start();

// create a chunks array that is added to as data becomes available from the stream (by default this will be called once just before .onstop, but can be tweaked to happen more often with the `timeslice` parameter)
chunksRef.current = [];
mediaRecorder.ondataavailable = function (e) {
  chunksRef.current.push(e.data);
};

mediaRecorder.onstop = function (e) {
  // mark the end time so we can get total duration
  setEndRecordTime(new Date().getTime());
  // create the blob with the chunks array data
  const blob = new Blob(chunksRef.current, { type: 'video/webm' });
  setBlob(blob);
  setChunks(chunksRef.current);
  chunksRef.current = [];
};

setRecording(mediaRecorder);
The "Start Recording" button changes to a "Stop Recording" button which just runs recording.stop(); which triggers the onstop event callback above.
Did I mention the streams?
So we've dealt with the screen video stream and the webcam video stream by combining them in the canvas, but there are also two potential audio streams:
- The audio stream from screen sharing
- The audio stream from your microphone
And one thing that I found out was that you can't just pass two audio streams into the MediaRecorder and expect it to work. In fact, you can't even pass one audio stream and one video stream and expect it to work. So... all the streams have to be combined into one stream. With a whole load of documentation reading, I ended up using the AudioContext API.
	// combine final streams to combine the canvas video with all captured audio (from screen share and from user media)
    let finalStream = new MediaStream(capturing.canvas);

    // setup audio context so that we can merge two different audio tracks (merging as two audio tracks doesn't work, need to pass in as one track)
    const audioContext = new AudioContext();
    // plug in system audio if it exists
    let systemAudio;
    capturing.screen.getTracks().forEach((track) => {
      if (track.kind === 'audio') {
        systemAudio = audioContext.createMediaStreamSource(capturing.screen);
      }
    });
    let micAudio;
    // don't use mic audio if no mic selected and mic enabled
    if (audioInputDeviceId !== '' && micEnabled) {
      capturing.userMedia.getTracks().forEach((track) => {
        if (track.kind === 'audio') {
          micAudio = audioContext.createMediaStreamSource(capturing.userMedia);
        }
      });
    }

    var dest = audioContext.createMediaStreamDestination();
    if (systemAudio) {
      systemAudio.connect(dest);
    }
    if (micAudio) {
      micAudio.connect(dest);
    }
    // only add audio track if audio exists
    if (micAudio || systemAudio) {
      finalStream.addTrack(dest.stream.getTracks()[0]);
    }
With that final stream feeding into the MediaRecorder (as shown earlier)...
WE HAVE OUR DATA
With the data captured, we can now process it! We save the blob in state as type video/webm and pass it to a separate <VideoResult> component. It previews the video in a <video> component and allows you to either upload or download it based on how much you would like to trim the video.
To Satisfy Your Every Trim
Trimming was kind of a nice-to-have feature. The basic ability to trim the video to retrieve a specific segment of the video made a lot of sense; but I also realised if the only way to select start and end times was with a couple of text inputs then it would be particularly difficult to use. Ideally, you'd want a timeline and a way of visualising what part of the video would be extracted with visually rendered audio waves of some sort. And it would have interactive handles on either side that allowed you finite drag and drop control over the trimmed section. So this would require... more HTML canvas painting, audio data analysis, manipulation of recorded media, and drag and drop controls. Easy, right?
So inside the <VideoResult> is a <VideoTrimmer> which deals with min and max trim inputs. It uses simple drag handles:
<WaveformCanvas
blob={blob}
videoRef={videoRef}
videoDuration={videoDuration}
/>
<Styled.TrimArea
id="trim-area"
trimMin={displayData.minTrimX}
trimWidth={displayData.trimWidth}
disabled={disabled}
>
<Styled.TrimDragMin
draggable={!disabled}
onDragEnd={handleTrimMinOnDragEnd}
onDrag={handleTrimMinOnDragStart}
/>
<Styled.TrimDragMax
draggable={!disabled}
onDragEnd={handleTrimMaxOnDragEnd}
onDrag={handleTrimMaxOnDragStart}
/>
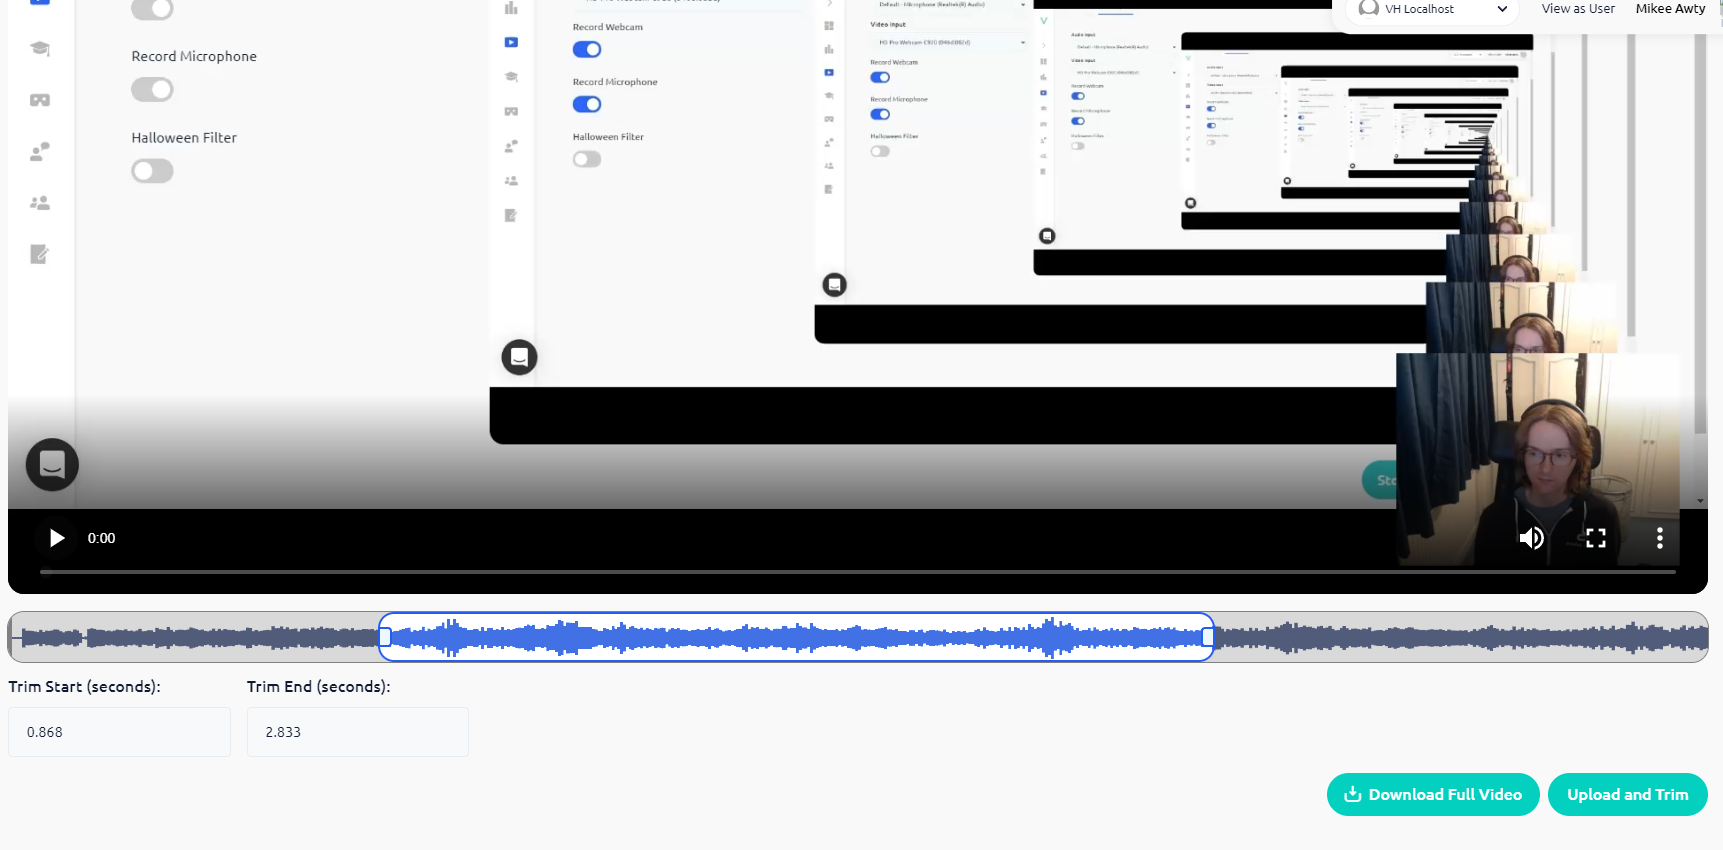
</Styled.TrimArea>This can be seen here:
So what's that <WaveformCanvas>doing? Quite a lot actually. Rather than posting the code here, I'll defer to CSS Tricks for their excellent implementation -where they explain it much better than I could.
The Settings Menu
In parallel to all of this work of course required some kind of menu to switch up the settings.
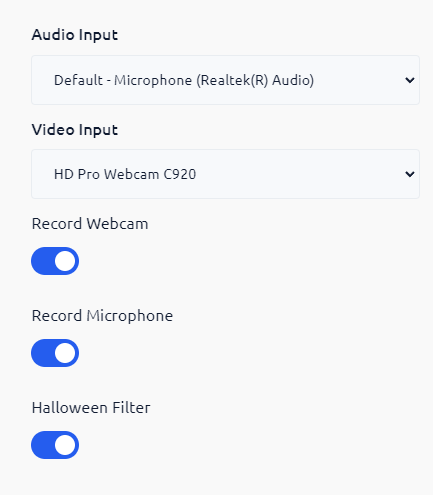
Each of the toggles is tied to a simple boolean component state variable and is used in its respective context. The Audio and Video Input dropdowns, however, are in a <InputDeviceSelect> component. A call is made on component mount to ensure we can trigger a prompt for permissions to access the relevant devices:
const userMediaCaptureStream = await navigator.mediaDevices.getUserMedia({
  audio: kind === 'audioinput',
  video: kind === 'videoinput',
});
And then, we generate the local state for the selectable devices, which populate the dropdowns:
navigator.mediaDevices.enumerateDevices().then((deviceInfos) => {
// deal with selectable devices ...
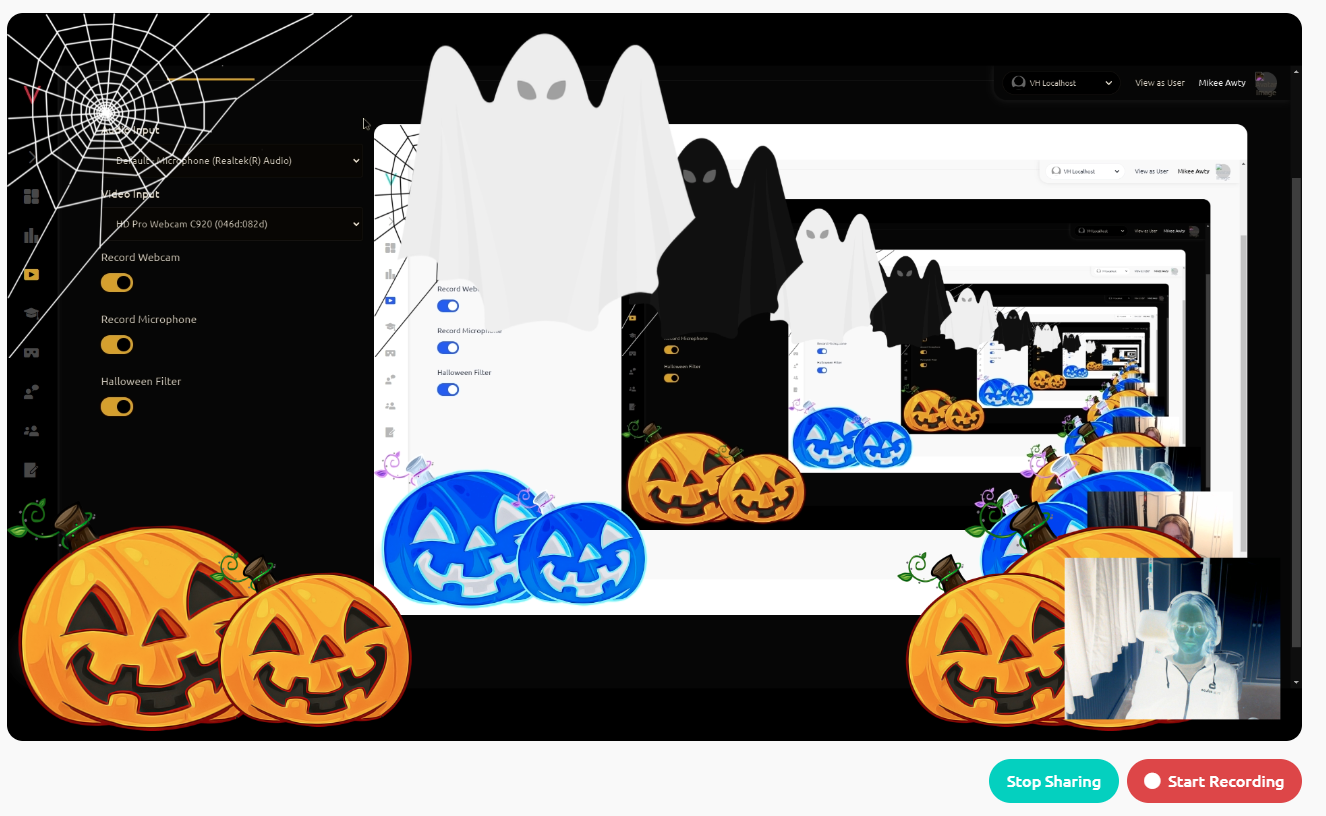
})The Halloween Filter
Definitely the most important feature of all was the Halloween Filter. This was the brief I was given, and by golly, this project was ending with at least one pumpkin.
It's easy enough to show some Halloween assets willy-nilly, but how do we get them to show up on the recording as part of the video stream itself? Fortunately, at this point, the streams were being rendered in a canvas already, which the MediaRecorder was recording. So the solution? Just paint the assets on the canvas! So I found some assets and added some code to the useAnimationFrame ticker:
if (halloweenFilter) {
// do a creepy invert!
context.filter = 'invert()';
// draw a cobweb
context.drawImage(cobwebRef.current, 0, 0, 512, 512);
context.filter = 'none';
// draw a ghost with the time variable to make it spookily move across the screen
const ghostDuration = 5000;
const t = (timeRef.current % ghostDuration) / ghostDuration;
context.drawImage(
ghostRef.current,
t * canvasRef.current.width * 2 - 512,
0,
512,
512
);
// pumpkins!
context.drawImage(
pumpkinRef.current,
0,
canvasRef.current.height - 600 / 2 - 60,
600 / 1.5,
517 / 1.5
);
context.drawImage(
pumpkinRef.current,
300,
canvasRef.current.height - 600 / 2 + 20,
600 / 2,
517 / 2
);
context.drawImage(
pumpkinRef.current,
canvasRef.current.width - 500,
canvasRef.current.height - 600 / 2 - 60,
600 / 1.5,
517 / 1.5
);
context.drawImage(
pumpkinRef.current,
canvasRef.current.width - 600,
canvasRef.current.height - 600 / 2 + 20,
600 / 2,
517 / 2
);
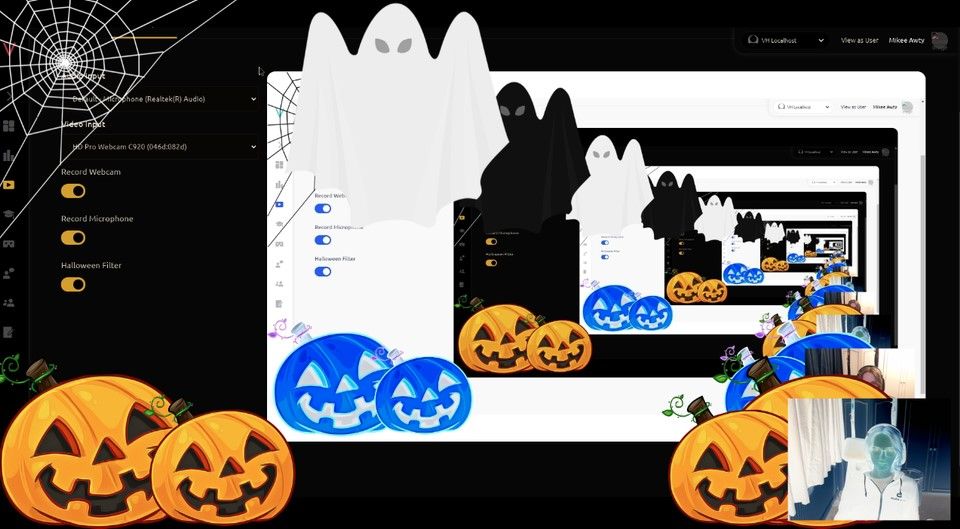
}The result of the creepy new filter!
Summary
Native APIs are very cool and thanks to extensive documentation and some fantastic tutorials, they are much simpler to use than expected. Streams are cool. Canvas is cool. Browsers are cool. And by cool, I mean accessible and useable without being an audio technician or mathematics professor.
In fact, the most difficult feature? That I had to give up on due to time limitations? Rotating a cobweb on a canvas (canvas rotations are a bit unintuitive).
I learned a lot in this project and surprised myself with what I managed to build in such a short space of time. With a little bit of polish, it was also pretty close to being releasable. So if you, too, are intrigued by native APIs but thought they'd be beyond you, don't let fear hold you back. You will learn a lot and may come up with some fabulous new things much more quickly than you think. To quote the ancient adage, the <canvas>is your oyster.
If you want to use tools like this to quickly record videos and create immersive training, please check out our website and sign up for a free trial at https://virti.com